Apache Solr for Advanced Data Management
Enhancing Search Capabilities with Apache Solr in Drupal

Introduction
Apache Solr is an open-source search platform developed by the Apache Software Foundation. It is built on the Apache Lucene library and offers powerful search and indexing capabilities for websites, databases, and enterprise applications. Apache Solr provides full-text search, faceted navigation, and near real-time indexing, making it an excellent choice for handling large volumes of structured and unstructured data.
For Drupal users, integrating Apache Solr enhances search functionality by improving accuracy, performance, and scalability. The Search API Solr Search module acts as a Solr backend for the Drupal Search API, enabling seamless integration and efficient data indexing.
Why Use Apache Solr?
Apache Solr is widely adopted for its ability to process queries efficiently, offering precise search results. Some key advantages include:
– Full-Text Search: Supports advanced text analysis for improved search relevance.
– Faceted Navigation: Allows users to filter search results dynamically using multiple criteria.
– Scalability: Optimized for handling large datasets with distributed search capabilities.
– High-Speed Indexing: Ensures near real-time updates, keeping content searchable instantly.
– Interactive Admin Interface: Simplifies configuration and monitoring of Solr instances.
By using Apache Solr with Drupal, developers can create a robust and flexible search experience with enhanced control over indexing and search results.
Implementing Apache Solr in Drupal
1. Install Apache Solr
Step 1: Install Java:
“`bash
sudo apt install openjdk-11-jdk
java -version
“`
Step 2: Download Solr: [https://solr.apache.org/downloads.html](https://solr.apache.org/downloads.html)
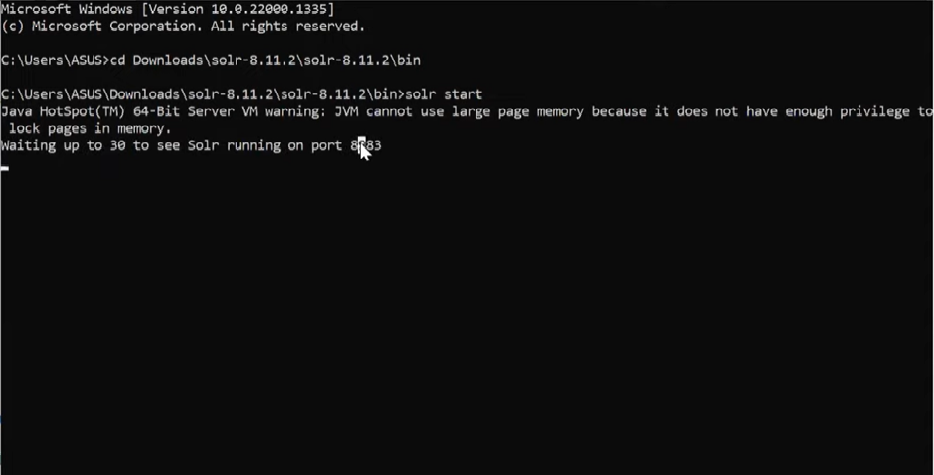
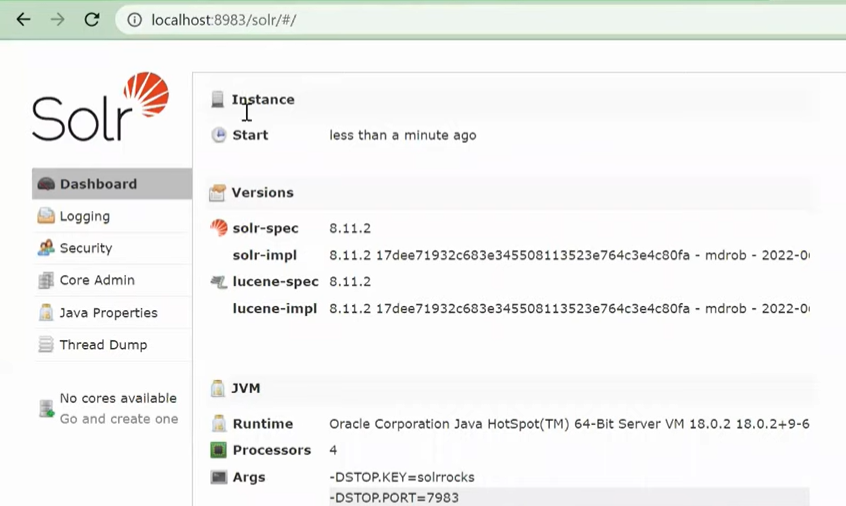
Now, Solr should be installed on your system. You can use these commands to start, stop, and check the status of the Solr service:
“`bash
sudo service solr stop
sudo service solr start
sudo service solr status
“`
2. Installing the Search API Solr Module in Drupal
Run the following command to install the Search API Solr module:
“`bash
composer require drupal/search_api_solr:^4.1
“`
Once it is done, enable the module. Go to Extend → Search API Solr Search → Enable it.
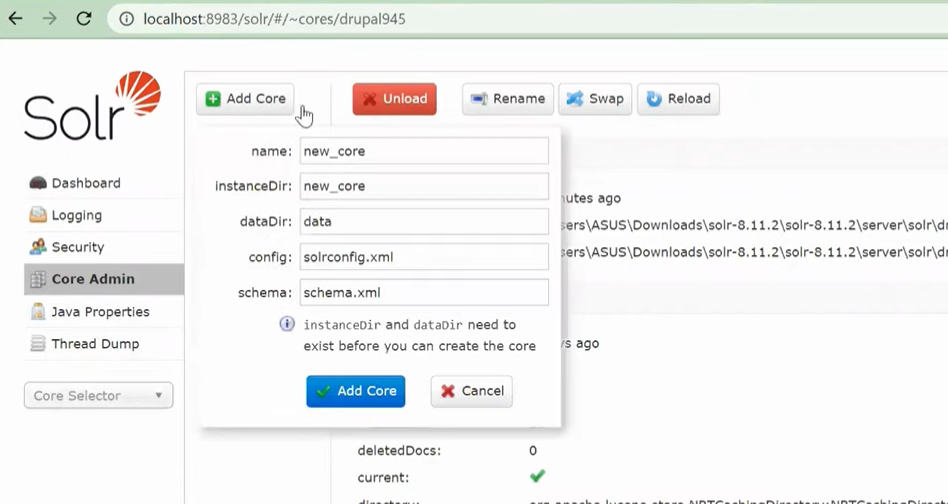
3. Configure Apache Solr with the Drupal Search
Step 1: Create a core in Apache Solr
Step 2: Create a Solr Server
In this step, you need to create a Solr server and index in your Drupal website. To create a Solr server, go to Configuration -> Search and Metadata -> Search API -> click on Add server.
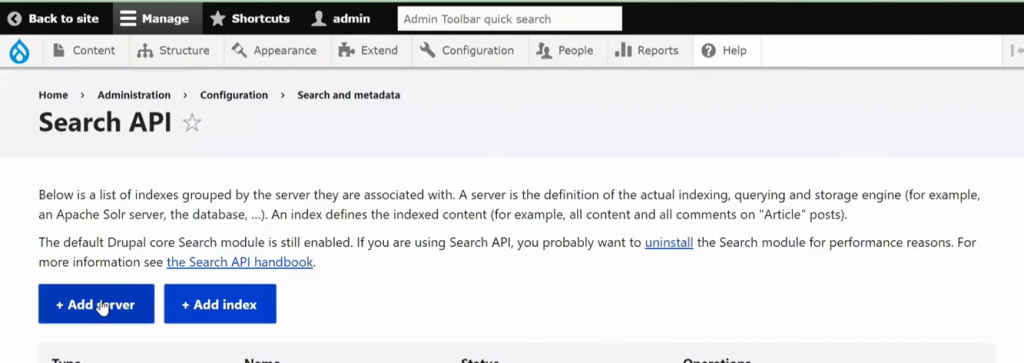
When you click on Add server, you will receive a form that you need to fill out:
Server name: Enter the server name.
Enable: You need to check the Enable checkbox. If you don’t enable it, you cannot index the items.
Add server description: A brief description of the server.
Next, you need to configure the Solr backend. Click on the “CONFIGURE SOLR BACKEND” in the form. You will see the form elements as shown in the image below:
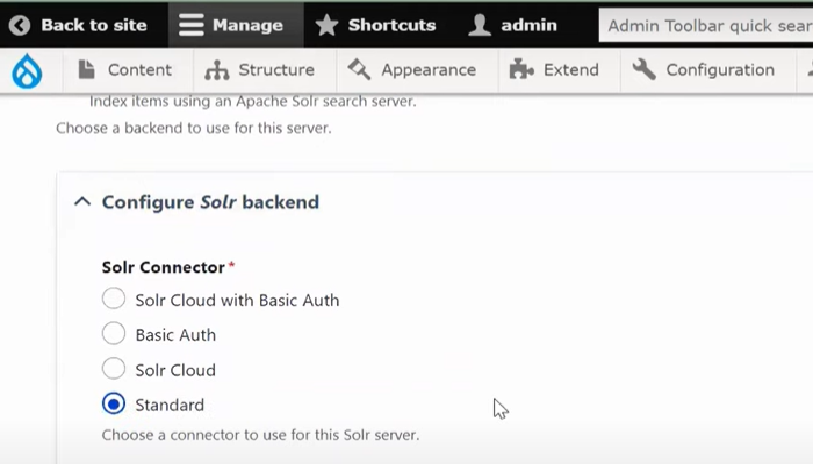
HTTP protocol: Choose HTTPS or HTTP (depending on whether your server uses SSL or not).
Solr host: localhost (if your Solr Server is on a different machine, please enter the IP or hostname of that host here).
Solr port: 8983 (This is the default port).
Solr path: “/” (the path to locate the server; this is based on the Solr server version. If the Solr server version is 6.6.4, in this case, the Solr path is different like “/solr” ).
Solr core: Enter the Solr core name that you created before.
The values as defined by default work fine. However, you can also change them accordingly.
Step 3: Create the Search Index
Here, we are going to create a Search API index that will index the data sources that you selected in the index. To create an index, go to Configuration -> Search and Metadata -> Search API -> Add index.
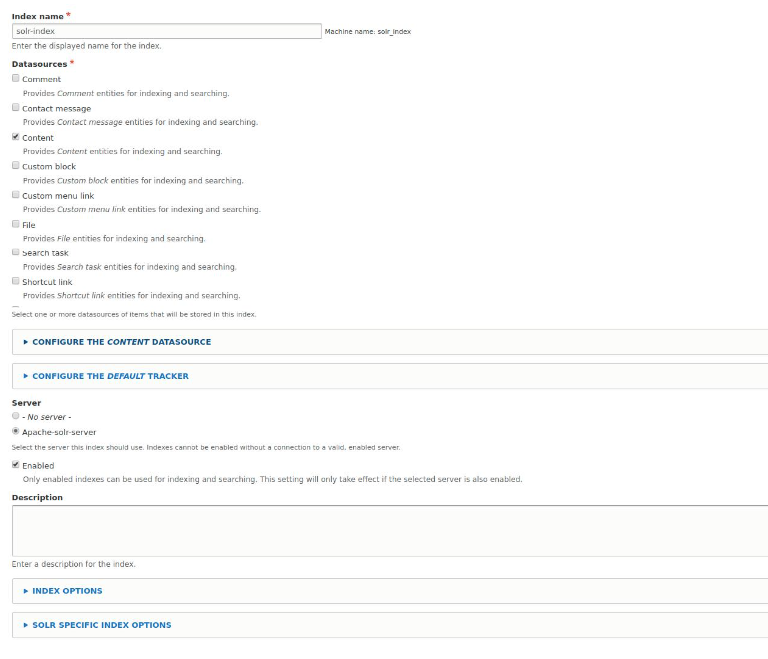
After successfully creating an index, you now need to add fields to the index. To add the field that you need, go back to the Search API and click on Edit the index that you have created. You will then see the Fields tab. Click on the Fields tab, and you will see a window, as shown in the image below.

Next, click on Add fields. In the popup that appears, you need to add the fields you need. After adding the fields, click on Done and then Save.
Now, the index and server are created on the website. After this, the next important step is to copy the configuration files to the Solr core. For this, you need to download the config files from the server on the website.
Go to Configuration -> Search and Metadata -> Search API -> .
You will get a window as shown in the image below.
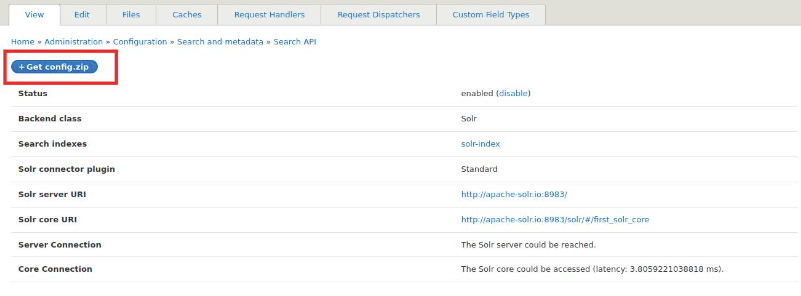
Next, click on the “Get config.zip” button. This will download the config folder. Once done, extract the zip folder and copy all the files into the conf folder in the core.
In the data folder, you will see the Solr core folder, which you had created earlier. Go to that Solr core folder, and you will find a folder with the name conf. In this folder, you will find some files. Delete those files and copy all the files from the config folder that is downloaded from the website server. Once done, you need to restart your Solr server in the terminal.
Next Step: Index the Contents
Go to Configuration -> Search and Metadata -> Search API -> click on the index that you have created. You will see a window, as shown in the image below.
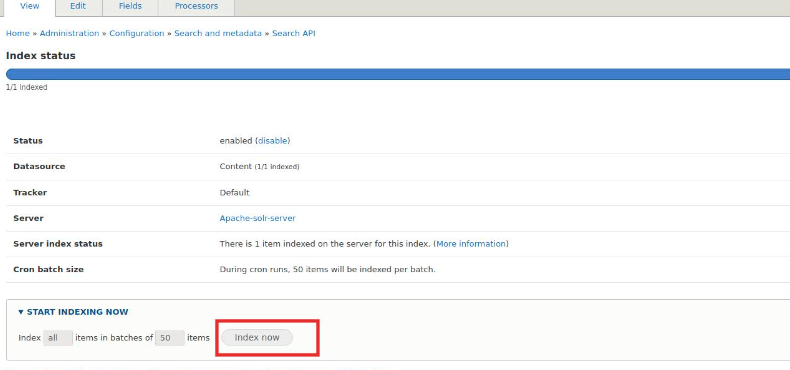
Next, click on the index to index the contents. Now, all the contents are indexed in the Solr core. You can create a view of the Solr index and add the indexed fields to the view to get the results from the Drupal Solr.
Conclusion
Integrating Apache Solr with Drupal significantly enhances search performance by offering full-text search, faceted navigation, and scalable indexing. By properly configuring Solr and the Search API Solr module, developers can provide a highly efficient and interactive search experience.
Additionally, adopting Indexing Strategies for MySQL 8.0 can further optimize database performance, reducing query execution times and improving overall search efficiency. Combining these approaches ensures a powerful data management system capable of handling extensive content repositories with ease.
Do you like to read more educational content? Read our blogs at Cloudastra Technologies or contact us for business enquiry at Cloudastra Contact Us.