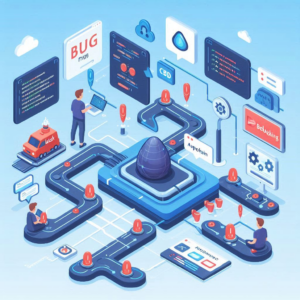
Automate Code Bug Fixing with CI/CD Pipeline in Flask
Creating and Deploying a Code Bug-Fixing Application Using Flask
This comprehensive guide outlines the development of a code bug-fixing application utilizing Flask. It streamlines the process of identifying and resolving errors in code. The application leverages the capabilities of OpenAI’s GPT-3.5 language model. This provides an efficient solution for developers. Throughout this guide, we will incorporate principles of continuous integration and continuous delivery. We will also discuss infrastructure as code, ensuring a seamless deployment experience.
Technical Requirements for CI/CD Pipeline Automation
Before diving into the development process, ensure you meet the following prerequisites. This will enhance your code bug-fixing application and automate the CI/CD pipeline:
Python 3.7 or later: Confirm that Python is installed on your machine.
Code Editor: A code editor such as Visual Studio Code (VSCode) is recommended.
Python Virtual Environment: Set up a virtual environment to manage dependencies effortlessly.
Flask Framework: Install Flask within your virtual environment.
OpenAI API Key: Obtain an API key from OpenAI to access the GPT-3.5 model.
Cloud Hosting Service: Use Microsoft Azure for deployment to facilitate continuous delivery.
Setting Up the Code Bug Fixer Project
1. Create the Project Structure: Open VSCode and create a new folder named `CodeBugFixer`. Inside this folder, set up the following files and directories:
“` CodeBugFixer/ ├── config.py ├── app.py ├── requirements.txt └── templates/ └── index.html
2. Install Required Libraries: Activate your virtual environment and install Flask and OpenAI libraries:
“`bash (venv) $ pip install flask openai “`
3. Configure API Key: Store your OpenAI API key securely in `config.py`:
“`python API_KEY = ‘your_openai_api_key’ “`
4. Create the Flask Application: Set up the basic structure of your Flask application in `app.py`:
“`python from flask import Flask, request, render_template from openai import OpenAI import config app = Flask(__name__) client = OpenAI(api_key=config.API_KEY) @app.route(“/”, methods=[“GET”, “POST”]) def index(): if request.method == “POST”: code = request.form[“code”] error = request.form[“error”] prompt = f”Explain the error in this code without fixing it:\n\n{code}\n\nError:\n\n{error}” model_engine = “gpt-3.5-turbo” explanation_completions = client.chat.completions.create( model=model_engine, messages=[{“role”: “user”, “content”: prompt}], max_tokens=1024, n=1, stop=None, temperature=0.2, ) explanation = explanation_completions.choices[0].message.content fixed_code_prompt = f”Fix this code: \n\n{code}\n\nError:\n\n{error}.\n Respond only with the fixed code.” fixed_code_completions = client.chat.completions.create( model=model_engine, messages=[{“role”: “user”, “content”: fixed_code_prompt}], max_tokens=1024, n=1, stop=None, temperature=0.2, ) fixed_code = fixed_code_completions.choices[0].message.content return render_template(“index.html”, explanation=explanation, fixed_code=fixed_code) return render_template(“index.html”) if __name__ == “__main__”: app.run(debug=True) “`
5. Create the HTML Template: Design a simple form for users to submit their code and error message in `index.html`: “`html
Code Bug Fixer
{% if explanation %}
Error Explanation:
{{ explanation }}
{% endif %} {% if fixed_code %}
Fixed Code:
{{ fixed_code }}
{% endif %}
“`
Implementing the Code Bug Fixer Backend
The backend implementation serves a critical role in processing user input and interacting with the OpenAI API:
1. Handling User Input:The application distinguishes between GET and POST requests, retrieving the user’s code and error message upon submission to facilitate bug fixing.
2. Generating Responses and Integration: The `client.chat.completions.create()` method interacts with the OpenAI API to generate explanations and fixed code. This demonstrates seamless integration for continuous delivery within your CI/CD pipeline.
3. Rendering the Template: After generating responses from the API, the application renders the `index.html` template. This displays the generated explanation and fixed code to the user effectively.
Testing the Code Bug Fixer App for Continuous Integration
Testing is vital for ensuring the functionality of your application. You can run tests locally to validate the system:
1. Run the Application: Execute the following command in your terminal: “`bash (venv) $ python app.py “`
2. Access the Application: Open your web browser and navigate to `http://127.0.0.1:5000/` to access the Code Bug Fixer interface. 3. Input Test Cases: Enter various code snippets with known errors. This is to verify that your implementation handles them correctly.
4. Verify Outputs: After submitting code and error messages, ensure that the explanations and fixed codes generated align with the expected outcomes.
Deploying the ChatGPT App to Leverage Infrastructure as Code in Azure
Once your code bug-fixing application is functioning correctly, deploying it to Azure will enhance its accessibility:
1. Create Azure Account: If you do not have an Azure account already, create one at [Azure Free Account](https://azure.microsoft.com/free/).
2. Install Azure CLI: Download and install the Azure CLI from the [official site](https://docs.microsoft.com/en-us/cli/azure/install-azure-cli).
3. Prepare for Deployment: Create a `requirements.txt` file in your project directory to document the dependencies: “`plaintext Flask==3.0.2 openai==1.13.3 “`
4. Deploy the Application: Utilize the Azure CLI to deploy your application: “`bash $ az webapp up –name –resource-group –runtime “PYTHON|3.10” “` Replace “ with a unique name for your app and “ with the name of your Azure resource group.
5. Access Your Deployed App: After successful deployment, the Azure CLI will provide a URL where your application is hosted. Share this URL to allow users in the UAE access to your Code Bug Fixer app.
Conclusion
In this guide, we successfully developed and deployed a code bug-fixing application using Flask and OpenAI’s GPT-3.5 language model. We incorporated essential practices like continuous integration, continuous delivery, and infrastructure as code. This application empowers developers to identify and rectify code errors efficiently. By following the outlined steps, you can further enhance the application. You may integrate additional features or explore other deployment platforms. This adds value to your development process. Additionally, understanding explanation types in XAI (Explainable AI) can help improve the interpretability of AI-driven debugging suggestions, making them more transparent and reliable. As you continue to build and optimize applications in the UAE, consider exploring advanced features to elevate user experiences and expand functionality.
Our website, Cloudastra Technologies, specializes in software services. We can help you achieve your business goals. For more inquiries, please visit our site.
Do you like to read more educational content? Read our blogs at Cloudastra Technologies or contact us for business enquiry at Cloudastra Contact Us.
